Recently, I’ve been creating several Cordova plugins, and each time, setting up the initial directory and file structure required effort.
Since the structure of a Cordova plugin is relatively consistent, I thought it would be a great idea to build a scaffolding tool that generates the base structure based on user input.
I’d like to introduce this tool—an npm package called @havesource/create-cordova-plugin—which I developed to simplify this process.
There are three ways to use it:
🚀 Using npm’s initializer
In my opinion, this is the quickest way to get started.
Open a terminal and navigate to the folder where you want to create the plugin.
Note: This tool generates a folder based on the plugin name, so you don’t need to create the plugin directory manually.
Run the following command:
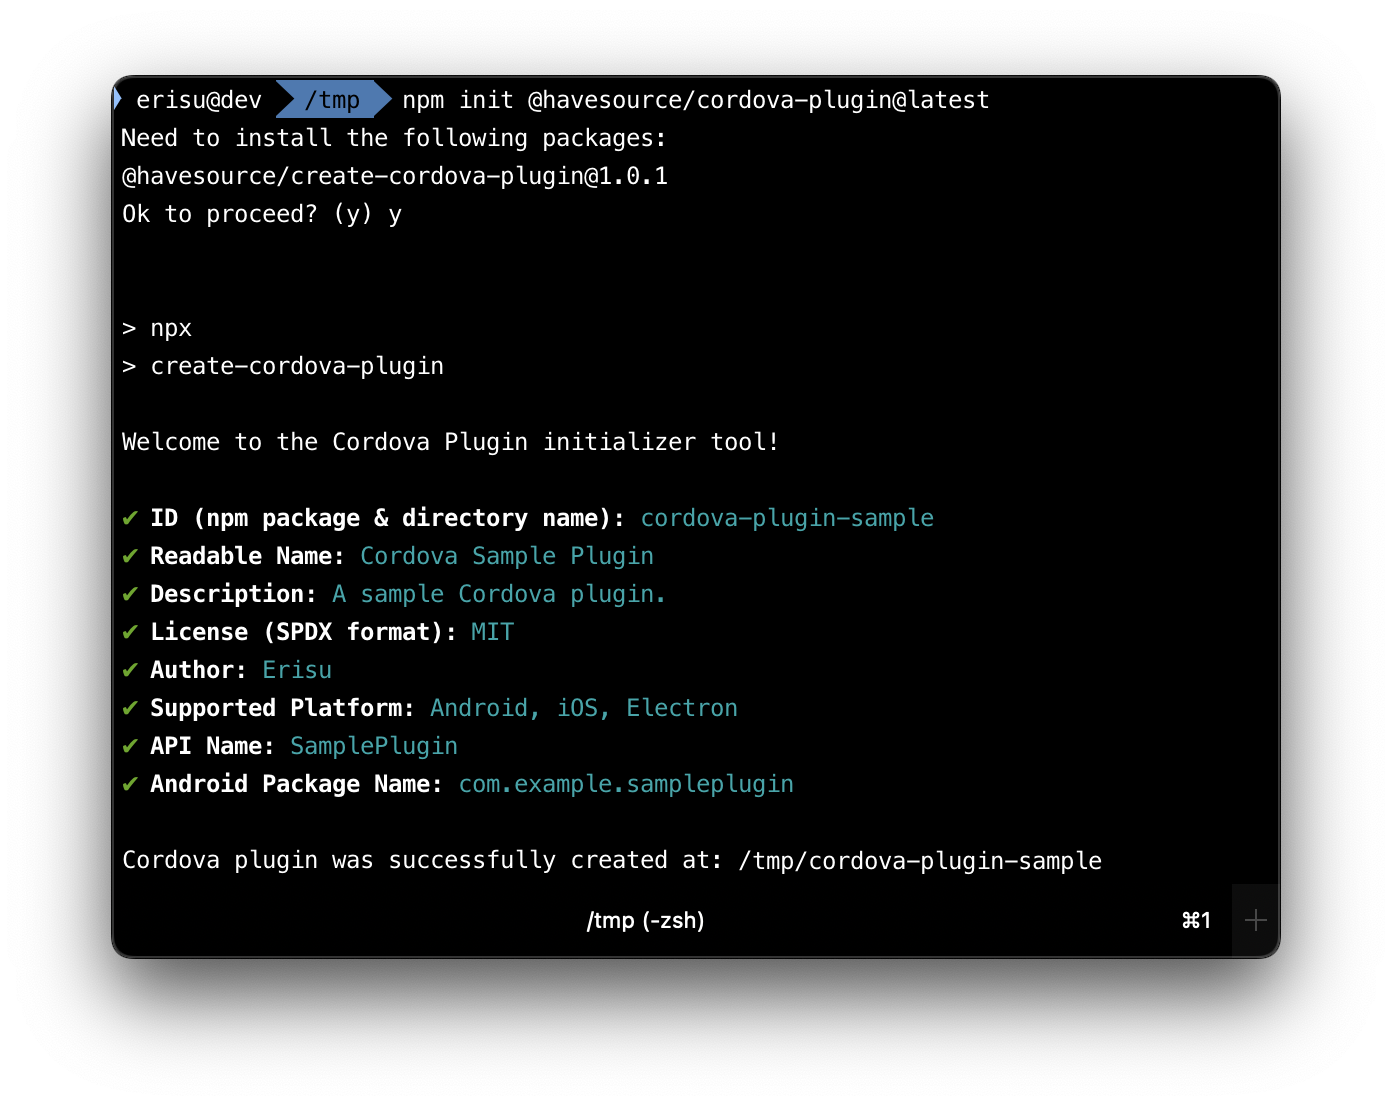
npm init @havesource/cordova-plugin@latestNote: Omitting the
@latesttag will use the previously cached version instead of fetching the newest release.
npm will notify you that it needs to install the package @havesource/create-cordova-plugin. Once you confirm, it will install the package into cache and proceed with the scaffolding process.
🌍 Installing the package globally
If you plan to create multiple plugins or prefer not to rely on a cached version that may be cleared over time, you can explicitly install the package globally with the following command:
npm install -g @havesource/create-cordova-plugin@latest
Once installed, you can run the scaffolding tool from any directory using:
create-cordova-plugin
📂 Installing the package locally in a project
You can also install the package within a local project with the following command:
npm install @havesource/create-cordova-plugin@latest
This will allow you to manage the tool’s version on a project-by-project basis. Once installed, you can execute the following command within your project directory:
npx create-cordova-plugin
🛠️ The Scaffolding Tool Prompt
The tool asks a few questions to determine the plugin’s basic information and supported platforms.
For a complete and up-to-date list of questions, check out the package’s README: github:havesource/create-cordova-plugin.
As of this writing, the questions asked are:
ID (npm package & directory name)
- The npm package name (i.e., the Cordova plugin name) and the directory name where plugin files will be placed.
- Example:
cordova-plugin-sample
Readable Name
- A human-readable name for the plugin, written in
plugin.xml. - Example:
Cordova Sample Plugin
- A human-readable name for the plugin, written in
Description
- A short description explaining the plugin’s purpose, included in
plugin.xmlandpackage.json. - Example:
A Cordova plugin that...
- A short description explaining the plugin’s purpose, included in
License
- The license under which your plugin will be distributed, written in SPDX format.
- Note: The input is not validated, so double-check for typos.
- Example:
MIT,Apache-2.0,SEE LICENSE IN LICENSE(for custom or proprietary licenses).
Author
- The author (individual or organization) of the plugin, recorded in
plugin.xmlandpackage.json.
- The author (individual or organization) of the plugin, recorded in
Supported Platforms
- Select the platforms your plugin will support.
- Available options: Android, Electron, iOS.
- The tool will update
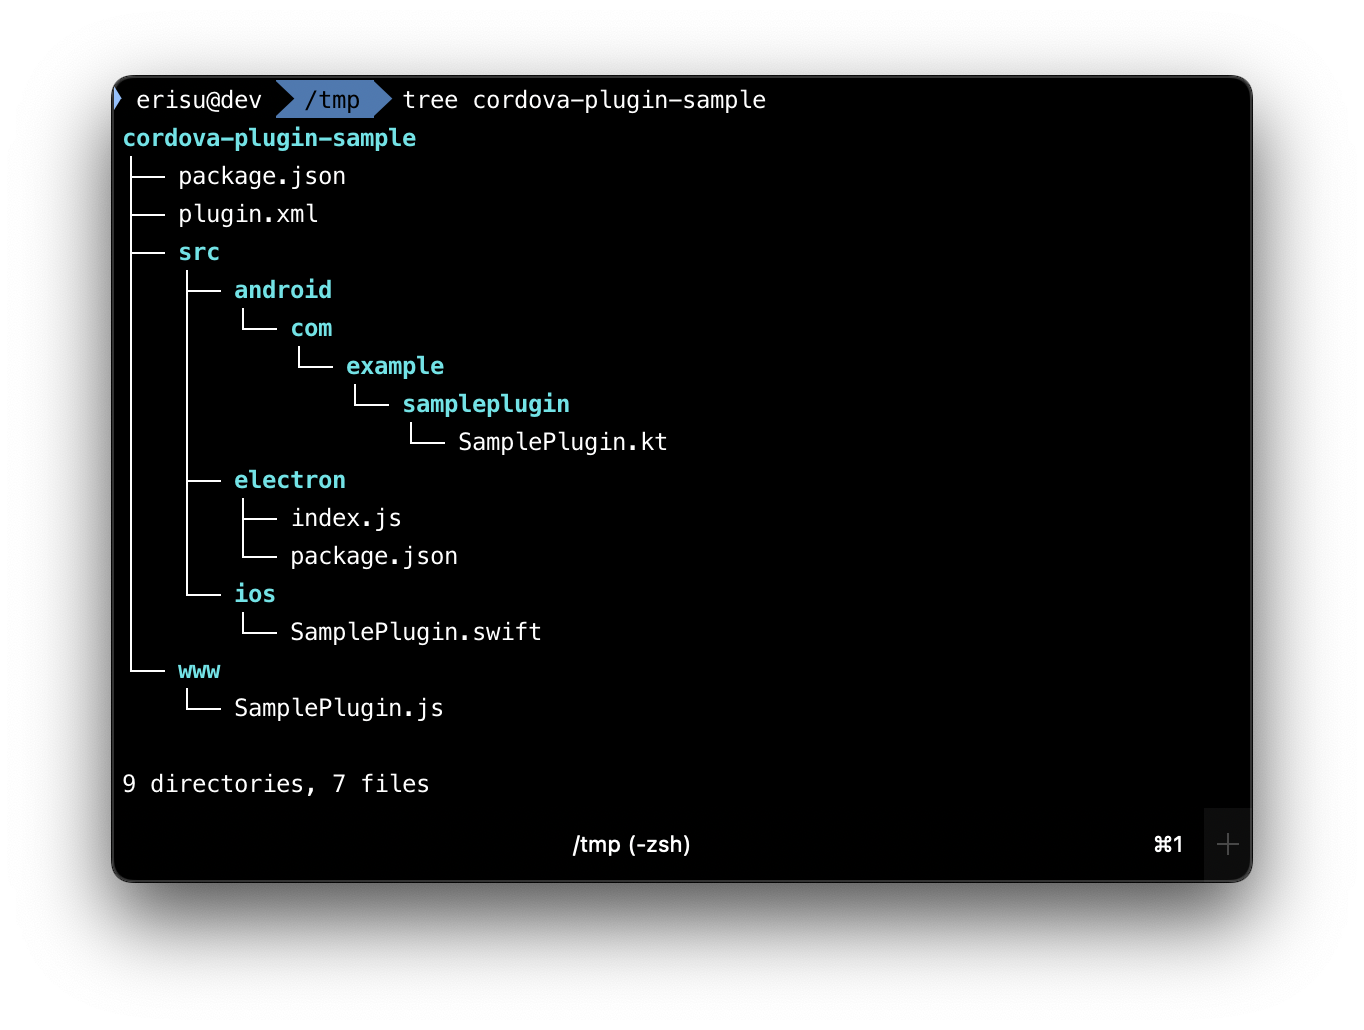
plugin.xmlandpackage.jsonaccordingly and scaffold the appropriate source directories and files.
API Name
- Defines the plugin’s API name, which is also used as the service file name for selected platforms.
- Example:
SamplePlugin- If
Androidis supported, it createsSamplePlugin.ktwith class nameSamplePlugin. - If
iOSis supported, it createsSamplePlugin.swiftwith class nameSamplePlugin. - Creates
SamplePlugin.jsin thewwwdirectory, exporting theSamplePlugininstance. - Ensures
plugin.xmlthat defines the js-module and munges the instance into the window scope withwindow.SamplePlugin.
- If
Android Package Name
- If
Androidis selected, this defines the plugin’s Android package name. - It also determines the directory structure where the service file is created.
- Example:
com.example.sampleplugin
- If
That’s it! After you answer the questions above, the tool will create the directory structure and configure the necessary files.
I hope you find this tool useful and that it helps speed up plugin development by simplifying the initial setup process.